Skill Level:
Crafting Time:
Material(s):
Category:
Share This Craft
Search Crafts
Foamies

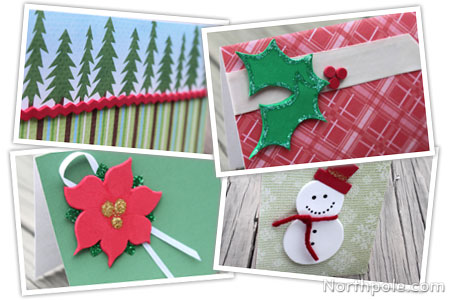
Craft foam is an easy way to make cards unique—these patterns and shapes would not be nearly as interesting if they were cut from ordinary paper. The 3D effect adds a nice element to the cards. Happy card making!
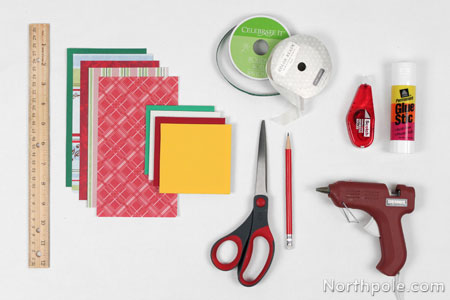
Basic Supplies:

- Printable template (download here)
- Foam, assorted colors, 3mm thick
- Assorted cardstock
- Assorted scrapbook paper
- Scissors
- Ruler
- Pencil
- Glue stick or tape runner
- Mini hot glue gun & glue sticks
- Assorted ribbon
Snowman Card

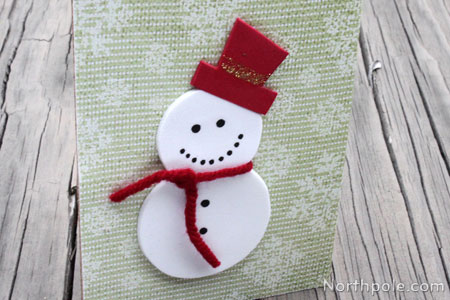
What is it about snowmen that makes them so cute? Perhaps it has something to do with the fact that they just look soft and squishy—not to mention that they are pleasingly plump. (Who’s ever heard of a skinny snowman, anyway?) This snowman has a lot going for him: he’s smiling while wearing a top hat and scarf. Without a doubt, he’ll bring a warm smile to someone’s face when they receive this card.
Supplies & Tools:
- Basic supplies (see above)
- Gold glitter glue
- Black paint pen
- Red yarn
�Directions:
- Print out template and cut out pieces.
- Trace snowman pattern on white foam. Cut out foam and set aside pattern and excess foam.
- Trace hat pattern on red foam. Cut out foam and set aside pattern and excess foam.
- Use glitter glue to add a stripe to the hat. Set aside and let dry.
- Use the black paint pen to draw eyes, mouth and buttons. Set aside and let dry.
- Measure and cut a 6" x 8" piece of cardstock.
- Fold cardstock in half, forming a 6" x 4" card.
- Cut a piece of yarn that is 7" long.
- Tie around snowman’s neck.
- Using hot glue, glue snowman slightly lower than the center of card.
- Glue hat in place.
- Now write whatever text you like on the card!

Elfy Hint:
- This card will fit in an A4 envelope, and you can find A4 envelopes like these at envelopes.com.
Ho Ho Ho Holly

Add this iconic Christmas greenery to any card. Outline the leaves with glitter glue to define the shape of each leaf while adding sparkle.
Supplies & Tools:
- Basic supplies (see above)
- White ribbon, 1" wide
- One-hole punch
- Glitter glue
- Double-sided tape
Directions:
- Print the�template�and set aside.
- Measure and cut a 6" x 8" piece of white cardstock.
- Fold cardstock in half, forming a 6" x 4" card.
- Measure and cut a 6" x 4" piece of scrapbook paper.
- Glue scrapbook paper to the front of card using glue stick or a tape runner.
- Cut a 5.5" piece of ribbon. Cut a diagonal line on one end.
Note: You can seal the edges with a flame. - Stick ribbon to card using double-sided tape.
- Take the printed template and cut out the holly pattern.
- Trace onto green foam and cut out.
- Using glitter glue, draw leaf outlines on the holly leaves. Let dry.
- Use hot glue to stick holly leaves onto card.
- To make the berries, use one-hole punch to cut out 3 circles from the red foam.
- Carefully glue the berries onto the card.
- Now write whatever you like on the card!

Elfy Hint:
- This card will fit in an A4 envelope, and you can find A4 envelopes like these at envelopes.com.
A Pretty Poinsettia

Add a little poinsettia to your cards for a floral flair. We used green glitter ribbon for the leaves and gold glitter glue in the center.
Supplies & Tools:
- Basic supplies (see above)
- Green glitter ribbon
- Thin white ribbon, 1/8" wide
- Gold glitter glue
Directions:
- Print the template and cut out poinsettia.
- Trace onto red foam and cut out.
- Cut six 1" pieces of green glitter ribbon.
- Cut one end of ribbon to a rounded point, forming a leaf. Repeat for each piece of green ribbon.
- Use hot glue to attach the leaves to the back of the flower.
- Cut a 9" piece of white ribbon.
- Form a loop with the ribbon and glue to the back of the flower.
- Squeeze 3 dots of gold glitter glue into the center of the flower. Set aside and let dry.
- Measure and cut a 6" x 8" piece of green cardstock.
- Fold in half forming a 6" x 4" card.
- Glue the poinsettia to the front of the card.

Elfy Hint:
- This card will fit in an A4 envelope, and you can find A4 envelopes like these at envelopes.com.
Faux Rick Rack

Use a pair of decorative scissors to cut a piece of “rick rack” from craft foam. If you have multiple pairs of decorative scissors, get creative with different shapes to give your cards some pizzazz.
Supplies & Tools:
- Basic supplies (see above)
- Decorative scissors
Directions:
- Measure and cut a 6" x 8" piece of white cardstock.
- Fold cardstock in half, forming a 6" x 4" card.
- Measure and cut a 6" x 4" piece of scrapbook paper.
- Glue scrapbook paper to the front of card.
- Using decorative scissors cut a thin strip of red foam.
- Use hot glue to stick the foam onto the card. Use very little glue to keep glue from oozing out from under the foam. Glue small sections at a time so that the glue doesn’t harden before you attach the foam to the card.
- Add any text that you like on the front.
- Now your card is finished!

Elfy Hint:
- This card will fit in an A4 envelope, and you can find A4 envelopes like these at envelopes.com.


