Skill Level:
Crafting Time:
Material(s):
Category:
Tag(s):
Share This Craft
Search Crafts
Holiday Pin Board

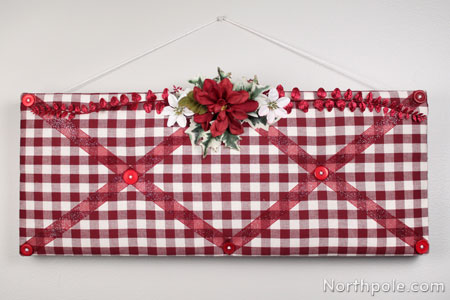
This pin board is a great way to display Christmas cards, pictures, and the like. Embellish the top with silk flowers and greenery for a seasonal touch.
We found the foam for our board’s base while scrounging around the closet in the Craft Cottage, but you can use a variety of things to make yours. Large sheets of green foam can be found at the craft store, or you could repurpose an old corkboard that you may have lying around the house. Sometimes you can also find big blocks of foam inside boxes of large purchases (e.g., TV). Alternatively, you could make your base by stacking sheets of cardboard together. Thrift stores are also great places to find materials for craft projects!
It is not ideal to hang boards made of foam, but they are very pretty when displayed on an easel, mantelpiece, or even propped up on a table. Read on to find out how to make your own festive pin board.
Supplies & Tools:
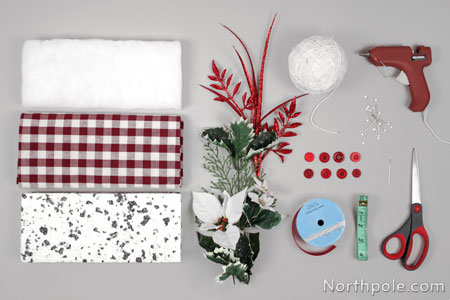
- Foam*
- High loft batting
- 1 yard fabric*
- 0.5" wide ribbon
- Pearl pins
- Large buttons
- Hot glue gun & glue sticks
- Yarn
- Scissors
- Heavy duty hand needle
*If your foam board is longer than 30", then you will need to get more fabric accordingly.
Directions:
Measure & Cut:
- Measure dimensions of your foam.
- To completely cover the board (front & back)
- Length = (2 x length of board) + (2 x depth of board) + 3"
- Width = width of board + (2 x depth of board) + 3"
- Lay fabric on a flat surface. Measure and cut fabric using the formula above.
- Measure and cut 1 piece of batting that is length x width of the foam board.ďż˝ (You can use two pieces of batting if you’d like yours to be fluffier.)
Add Batting & Fabric:
- Use a small amount of hot glue to glue the corners of batting to the foam. Set aside.
- Lay fabric on flat surface, wrong side up.
- Place foam board in center of fabric, batting side down.
- Holding board in place, fold one side of fabric over onto the back side, and use pins to secure along entire side.
- Slightly pull fabric on opposite side (until taut), fold the edge of fabric as necessary, and then use pins to secure fabric to foam.
- Repeat for remaining 2 sides.
Add Ribbon:
- Lay ribbon on board as you want. Use pins to hold ribbon in place as you decide the placement of the pieces. We used 2 long pieces of ribbon and just folded the ribbon to create a “v” shaped lines.
- Once ribbon is pinned down, you know how much ribbon you need. Cut ribbon from spool.
Add Buttons:
- Cut a strand of yarn that is about 18" long.
- Thread yarn through the eye of an upholstery needle.
- Remove pin (from foam) over the area where you are adding a button. Set pin aside.
- Push needle into the back side of foam so that it pokes through the front.
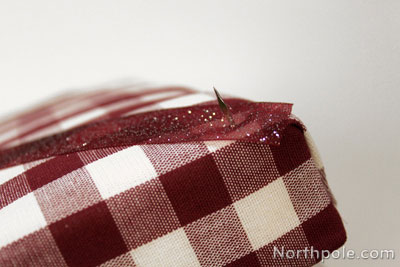
- Pull needle and yarn until there is about 2–3" of slack on the back side.
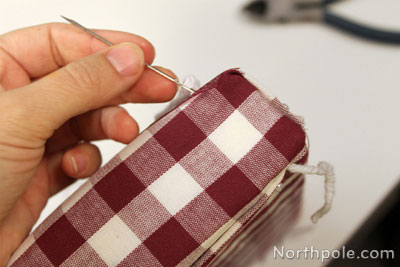
- Thread yarn through button and slide button down the yarn so that it is almost touching the board.
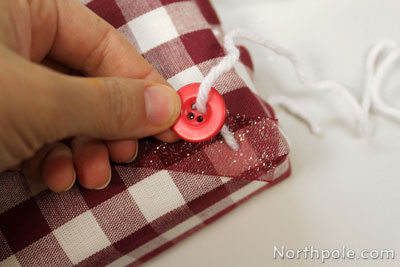
- Now create an “x” shape with yarn on the button.
- Thread yarn into the hole diagonally.
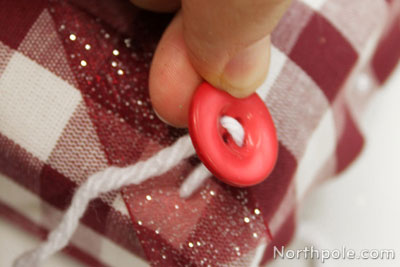
- Bring thread back up through and empty hole.ďż˝ As you thread the yarn through the last hole (creating the “x”) push the needle into the foam.
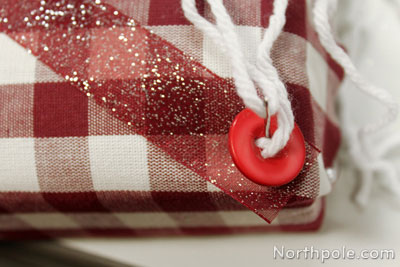
- Thread yarn into the hole diagonally.
- Pull needle through the foam and pull both ends of yarn taut. (If your needle is too short, use pliers to pull the needle through.) USE CAUTION.
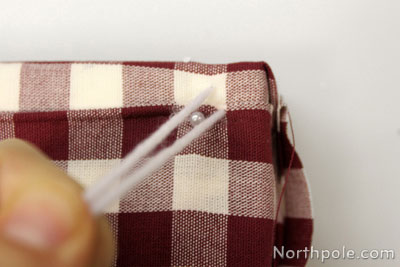
- Tie yarn ends in a knot. Trim yarn. Now one button is done.
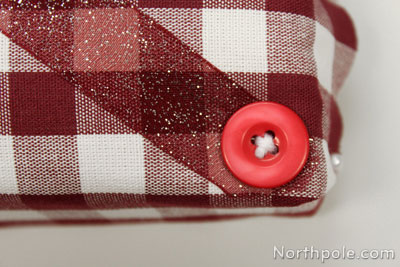
- Repeat steps 3–9 for each button.
- Add silk flowers and greenery, as desired. Now your board is ready to use.
Say you have a cork board that you only want to cover one side? No problem! Follow the steps below.
Directions for Covering a Cork Board:
Measure & Cut:
- Measure dimensions of board.
- To cover the front side only (covering a cork board)
- Length = length of board + (2 x depth of board) + 2"
- Width = width of board + (2 x depth of board) + 2"
- Lay fabric on a flat surface. Measure and cut fabric using the formula above.
- Measure and cut 1 piece of batting that is length x width of the cork board. (You can use two pieces of batting if you’d like yours to be fluffier.)
Add Batting & Fabric:
- Use a small amount of hot glue to glue the corners of batting to the board. Set aside.
- Lay fabric on flat surface, wrong side up.
- Place cork board in center of fabric, batting side down.
- Holding board in place, fold one side of fabric over onto the back side, and use hot glue to secure along entire side.
- Slightly pull fabric on opposite side (until taut), fold and glue all the way across that side.
- Repeat for remaining 2 sides.
Add Ribbon:
- Lay ribbon on board as you want. Overlap ribbon over edges so that it can be attached to the back.
- Cut ribbon in pieces.
- Glue one end of ribbon to the back of board.
- Bring ribbon to front side, then glue end to the back of board.
- Use a decorative nail to tack down the ribbon on the front side.
- Repeat steps 3–5 for each piece of ribbon.


